Followers

26 July 2012

Christmas Shaker Card

This card was made using the new goody
bag from Docrafts.
 

First mat and layer a piece of Kraft card and Christmas papers.
I used an inverted corner punch to add effect.
I then stamped a piece of white card stock using the
new urban stamp and water coloured the image. 
I then cut out very carefully between the railings
using a sharp craft knife.  I chalked the
left hand side of the card in gold/yellow to age it.


I stuck clear acetate to the back of the stamped image
and put black foam dimension pads around it,
added flower soft and beads and sealed it with
another piece of card the same size, prior to adhering to the card.
I added a piece of old Christmas ribbon tied
across the corner to finish.

Happy Days - Maze Book

Another DoCraft demonstration day project.

This maze book is made from one sheet of 12" x 12"
scrapbook papers. Once cut, folded and adhered
gives seven pockets for tags and many pages for
photos, journal cards etc.

This Maze Book was made using Chelsea green
scrapbook paper, ribbon and Happy Days sentiment
and blooms.


Each tag has been punched and natural twine
threaded through each.

This project is great fun for starting a mini
scrapbook for all ages.


25 July 2012

Lucy Cromwell

What can I say I just love Lucy Cromwell's range.

You can make so many different things in many different styles.

This first card is made using an A5 white card blank.
Using a mixture of Boofle and Lucy Cromwell papers,
all papers had their edges inked to give a
slight aged/distress look then faux stitching was added
to each, using a gel pen. Various embossing folders
were then using to added texture and finally the
decoupage added to finish.


This card was made cutting two different papers,
each covering half the card and a paper ribbon
adhered across the join. Inking the edges to distress.
Sentiment mat and layered using the same papers.
Paper flowers wired together and leaves cut using
Xcut quilling die to the corner of the decoupage.


Using the same layout as above, but using different
papers, flowers and decoupage.


Once the stepper card was cut and folded from
a white A5 card blank each section was mat and layered.
Decoupage was used for the main focal point and spotted
ribbon added to the right of is with pearl gems and
a wellington boot topper.
Each small section has a topper/sentiment in
varying sizes and pink gems all from the
Lucy Cromwell ultimate pack.


Wellington Driving

Quick and Easy Card


This is a very quick card to make,
I used a tall slender white card blank.
Cut a piece of card stock slightly smaller than
the card blank and using an inverted corner punch,
punch each corner, then cut another
piece of wellington paper slightly smaller again
and punch each corner again as before,
mat and layer these two pieces. 
Using a piece of striped paper lay this through the
centre as you would a ribbon. Ink the edges
of the topper and  attached to the card. 
Mat and layer a sentiment to the top.
Add a ribbon bow and three spotted buttons
and your card is done.


Fishing Cards

Three different fishing cards - these cards were
commissioned pieces.

The first is a scalloped easel card.
Clouds cut using an Xcut die
(only seen when the card is closed)
Mat and layer the oblong section, ink the edges,
add faux stitching and a piece of ribbon.
The bow is then glued to the ribbon separately.

Cut out a scallop mat and layer the decoupage to it,
adding three dark pearl gems.
Sentiment tag threaded with twine and a adhered
to the card with a foam dimension.

A further three dark pearl gems added to the ribbon
for interest and balance.

The stopper is done by laying a piece of card/paper
inking the the edges and adding a further three gems.

The sentiment was stamped and cut out using and
Xcut die, leaving enough space for writing.


The 5 x 7" card below was mat and layered using
Wellington papers.  A piece of silk ribbon wrapped
around the mat and layer prior to sticking to the
face of the card.
Wellington decoupage laid onto a die cut piece
of paper as a border. Fish embellishment, sentiment
tag mat and layered and threaded with twine.


This card was made using Jolly Nation decoupage
and Xcut door plate die cut paper to layer onto.
Jolly nation backing papers and black
card to give a border to the whole effect.
Computer digi sentiment cut out with a
punch and inked to age and a piece of organza
dot ribbon to finish.


24 July 2012

Diggity Dog Easel

Diggity Dog Easel

Those of you that have been to one of my demo's would
have seen this card already!

I have used an A5 white card blank cut a central
panel and folded in the centre.  Glued the two
outside pieces to the the main card to make it
more rigid.

Using white and blue card I have die
cut square scallop edge pieces, mat and layered onto
the easel and then glued the diggity dog decoupage to it.

The stopper is a piece of folded card, top side
embossed with Swiss dots and inside can
be used for a message, closed together with a piece of
ribbon.

Mat and layer the side panels, inking the edges to suit and
embellished with fabric flowers, beads and foliage.


23 July 2012

Wooden Trinket Box

This was a plain wooden box, which has then been
painted using Artist Metallic Acrylic paint,
(blue to the outside and pink inside)

I stamped an image by LOTV and painted it,
then I used an Inkylicious sentiment stamp
to the right of the image and LOTV Sentiment stamp
the the front.  Once the box was completely dry
I have spray enamelled it for protection.


Boofle


Boofle - Using a Papermania Card Kit

Basically this is mainly a kit with some added
embellishments like the sentiment, clear glaze, card
candi and the odd flower it does not need anything else.


Head over Heels!


Great kit for youngsters to have a go with.


This second card started out as a scalloped
6" X 6" card.  I used a punch to
cut off at least a third and used another
punch on lilac paper, laid near the punched card
edge.  Mat and layered papers to the rest of
the card face.  Using a piece of white card
stock I embossed it using the Boofle button
tri-boss folder and rubbed chalks over the surface to
add interest and colour.  I then glued using silicone
Boofle decoupage the the front of the piece of card,
along with a sentiment and attached this to the main
card front so it would stand up as seen. I then
embellished using flower blooms, die cut foliage
and Papermania bling.


Warren Rabbit


Hello everyone just come back to the land
of the living sorry been so busy with one thing and another.

Just a quick note to thank everyone for coming to
Gould's Garden Centre in Weymouth and The Range
in Dorchester in the last few weeks to see
some of my demo's.  I hope these have
given a bit of inspiration or just a friendly chat
either is welcome with the weather we have been having.

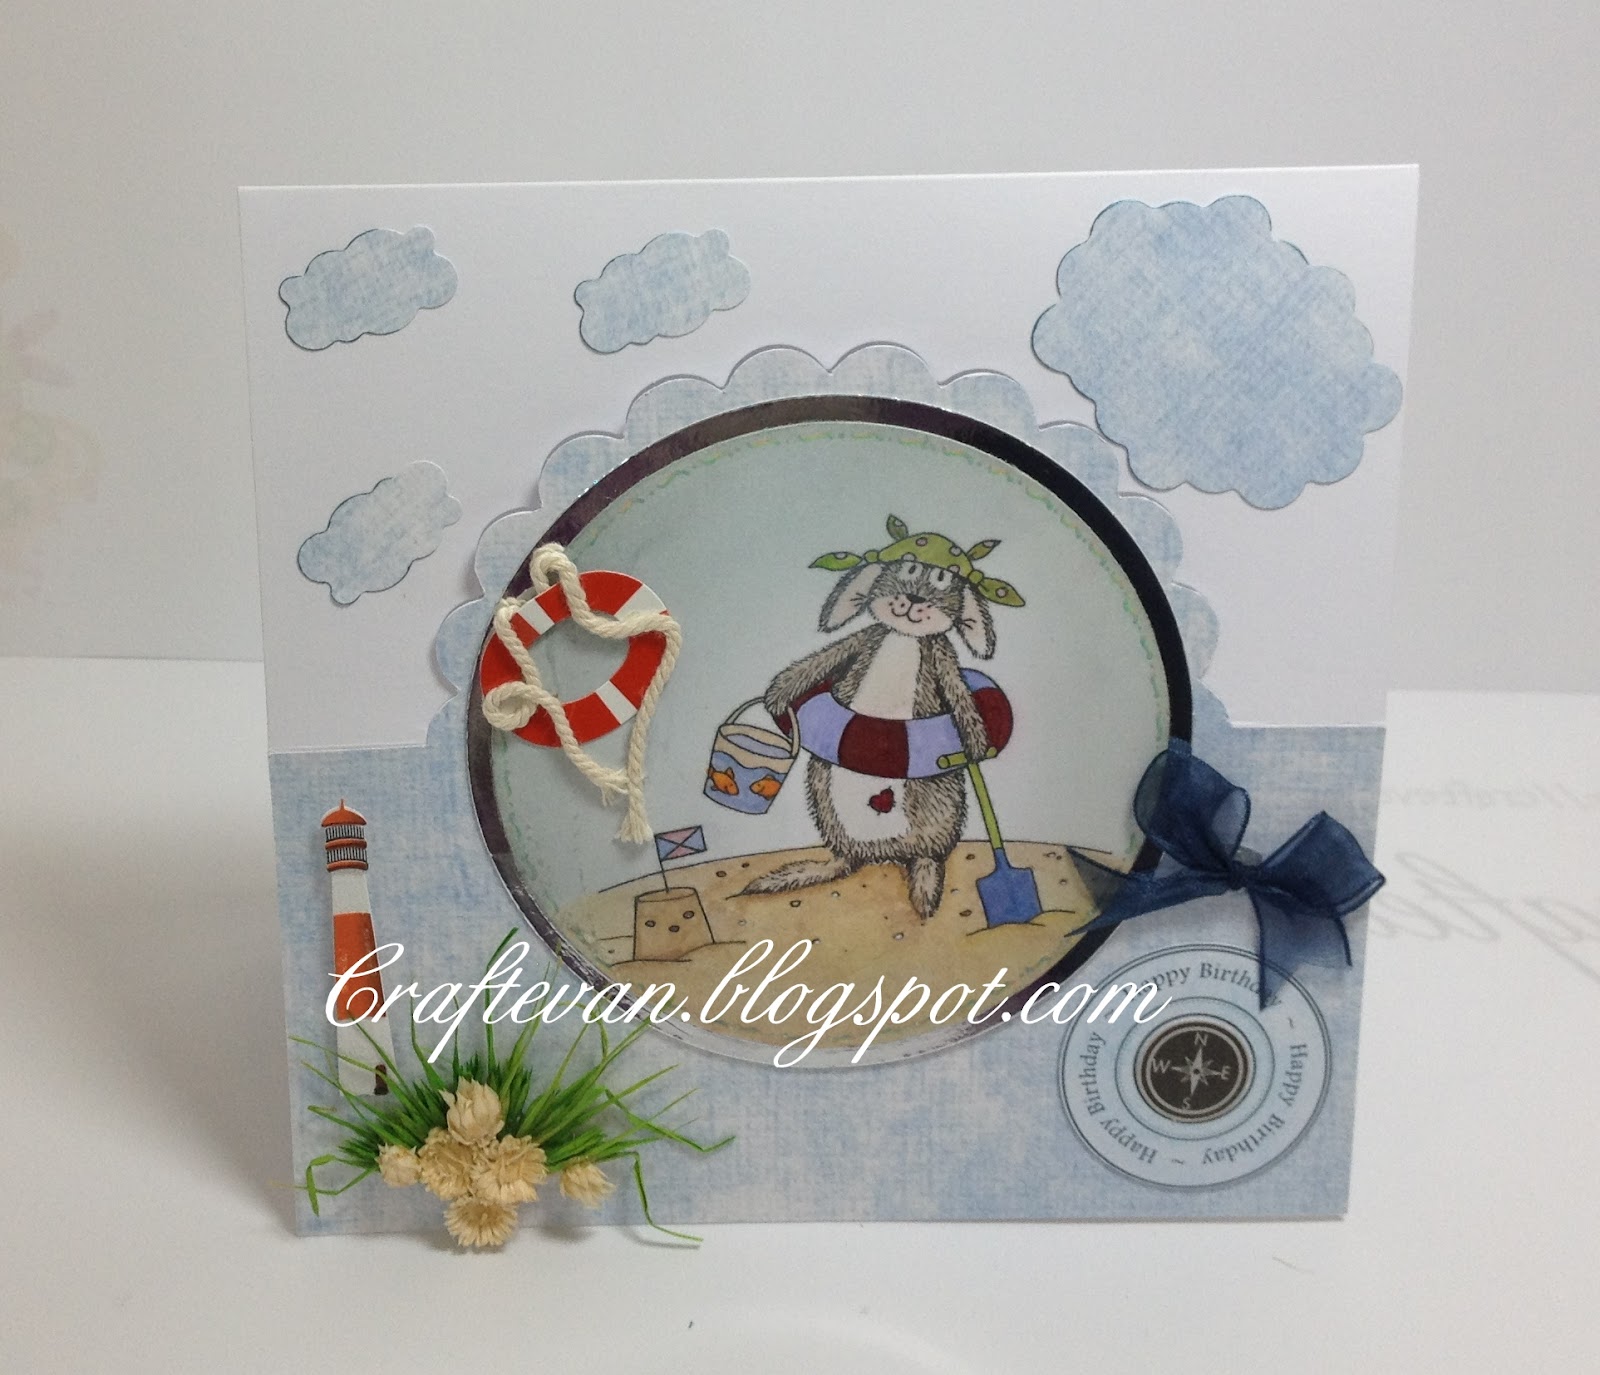
These cards below where made with Warren Rabbit images
which I found in 'My Mums Craft Shop' in Poundbury,
 Dorchester when I was having a mooch like you do!


This first card lent it's self to wedding/anniversary occasion. 
I water coloured the image lightly and used an Xcut
die on gold miri board to back it.  Xcut tri-boss
embossing  folder was used on the backing paper once
it had been cut using another Xcut die shape.  I covered
the whole of the front of the card with cream Dove craft
papers from a very old pack I had in my
stash (like you do!!!).  The flowers were a
dried arrangement also in my stash, but I
added a papermania gold bell for added interest along with
a gold sentiment.

I am very pleased with the overall look of this, picture does not do it justice.


This second card is a scallop circle 
easel card, again using a Warren Rabbit
image which has been water coloured. 
The clouds have been cut out using Xcut
dies to add more interest when the card is not stood up.


Here the card is stood as an easel card should,
so the clouds are not seen.  Again a great
image to work with and I had fun using up some old
crafting stash.


4 July 2012

Time Away

Sorry everyone I have been in Hospital for an op etc, so have not been around to keep up to date on my blog and the world of craft, but I am back now and will be uploading some new pieces shortly.

Thanks for your patience with me!